Indoor-Outdoor Thermometer with CHARGE Power Pack

Sometimes, the weather changes so often, so you’ll want to know the temperature to determine how you should dress. With two micro:bits and CHARGE Power Packs, you can learn what the temperature is like outside right now!
Prepare
With CHARGE for micro:bit
- 2x micro:bit (V1 or V2)
- USB cable
- Chromebook, laptop, or desktop
- Access to MakeCode
- 2x CHARGE Power Packs
- Waterproof plastic container
Without CHARGE
- 2x micro:bit (V1 or V2)
- USB cable
- Chromebook, laptop, or desktop
- Access to MakeCode
- 2x Power bank or battery pack
- Waterproof plastic container
Code
This project has different code on the two micro:bits:
- micro:bit 1: Outside Thermometer
- micro:bit 2: Inside Thermometer
- Open makecode.microbit.org
- Radio drawer: add “radio set group 1” to “on start” and set the group to a number between 1-255. If you’re using this near other pairs, make sure you’re not using the same group number.
- Radio drawer: add “radio send number 0” to “forever”
- Input drawer: drag “temperature (°C)” and drop onto the 0 in the “radio send number 0” code block.
- Basic drawer: add “pause (ms) 100” after “radio send number temperature.” Change the 100 to 10000. This will make the micro:bit send the temperature every 10 seconds (1 second = 1000 milliseconds)
- Plug in your micro:bit, pair, download your code.
- Next, plug in your second micro:bit.
- Open a new coding project.
- Radio drawer: add “radio set group 1” to “on start” and set the group to the same group number as the first micro:bit.
- Radio drawer: add “on radio received receivedNumber”
- Variables drawer: “Make a Variable” and name it something like outsideTemp.
- Variables drawer: add “set outsideTemp to 0” to “on radio received receivedNumber”
- Drag “receivedNumber” onto the 0 in “set outsideTemp to 0”
- Input drawer: add “on button A pressed”
- Basic drawer: add “show number 0” to “on button A pressed”
- Input drawer: drag “temperature (°C)” onto the 0 in “show number 0”
- Input drawer: add “on button A pressed” and change A to B
- Basic drawer: add “show number 0” to “on button B pressed”
- Variables drawer: drag “outsideTemp” onto the 0 in “show number 0”
- Plug in your other micro:bit, pair, download your code.
Test
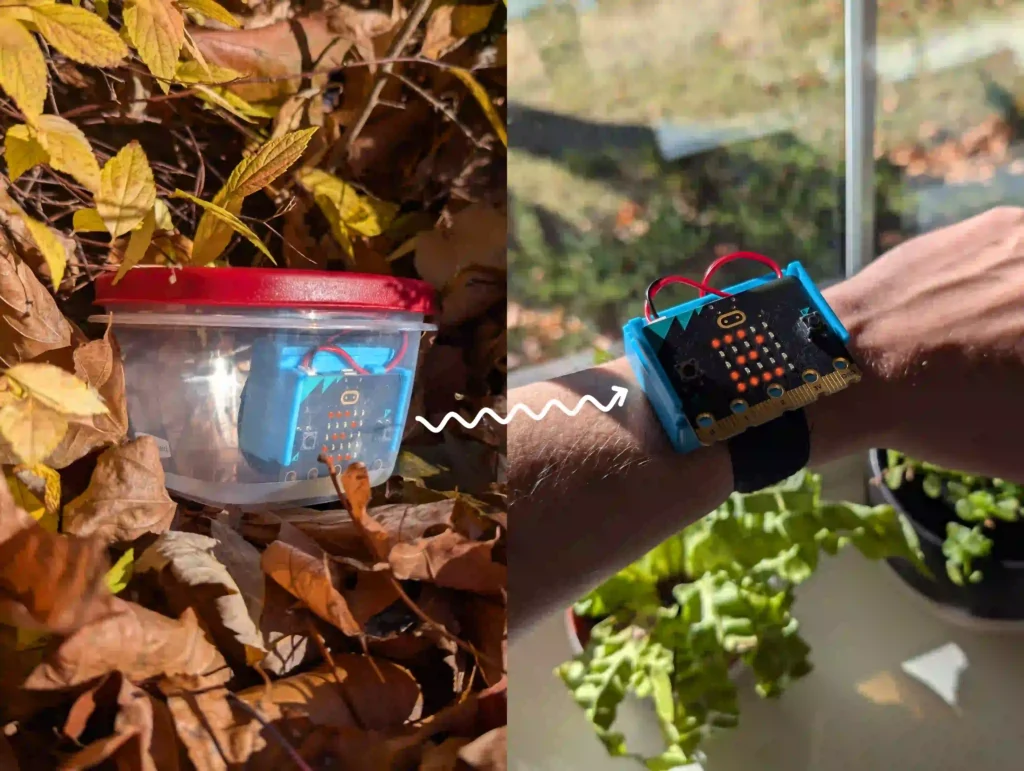
Plug the outside thermometer into the CHARGE power pack or external battery pack, turn it on and place it into a waterproof plastic container. Plug in and turn on the inside micro:bit and test that your code works. Then, set the outside micro:bit in the container outside somewhere protected. It’ll take some time to cool down or warm up, so if you don’t see a temperature change right away, wait a few minutes.
Improve
What steps could you take to save power on the outside micro:bit so it can last longer?
Unsure if your outside micro:bit is still sending data? Try adding a counter to check when the last radio transmission was received.
Related Content
Feeling Stuck? Explore the Knowledge Base for common questions and troubleshooting tips.


