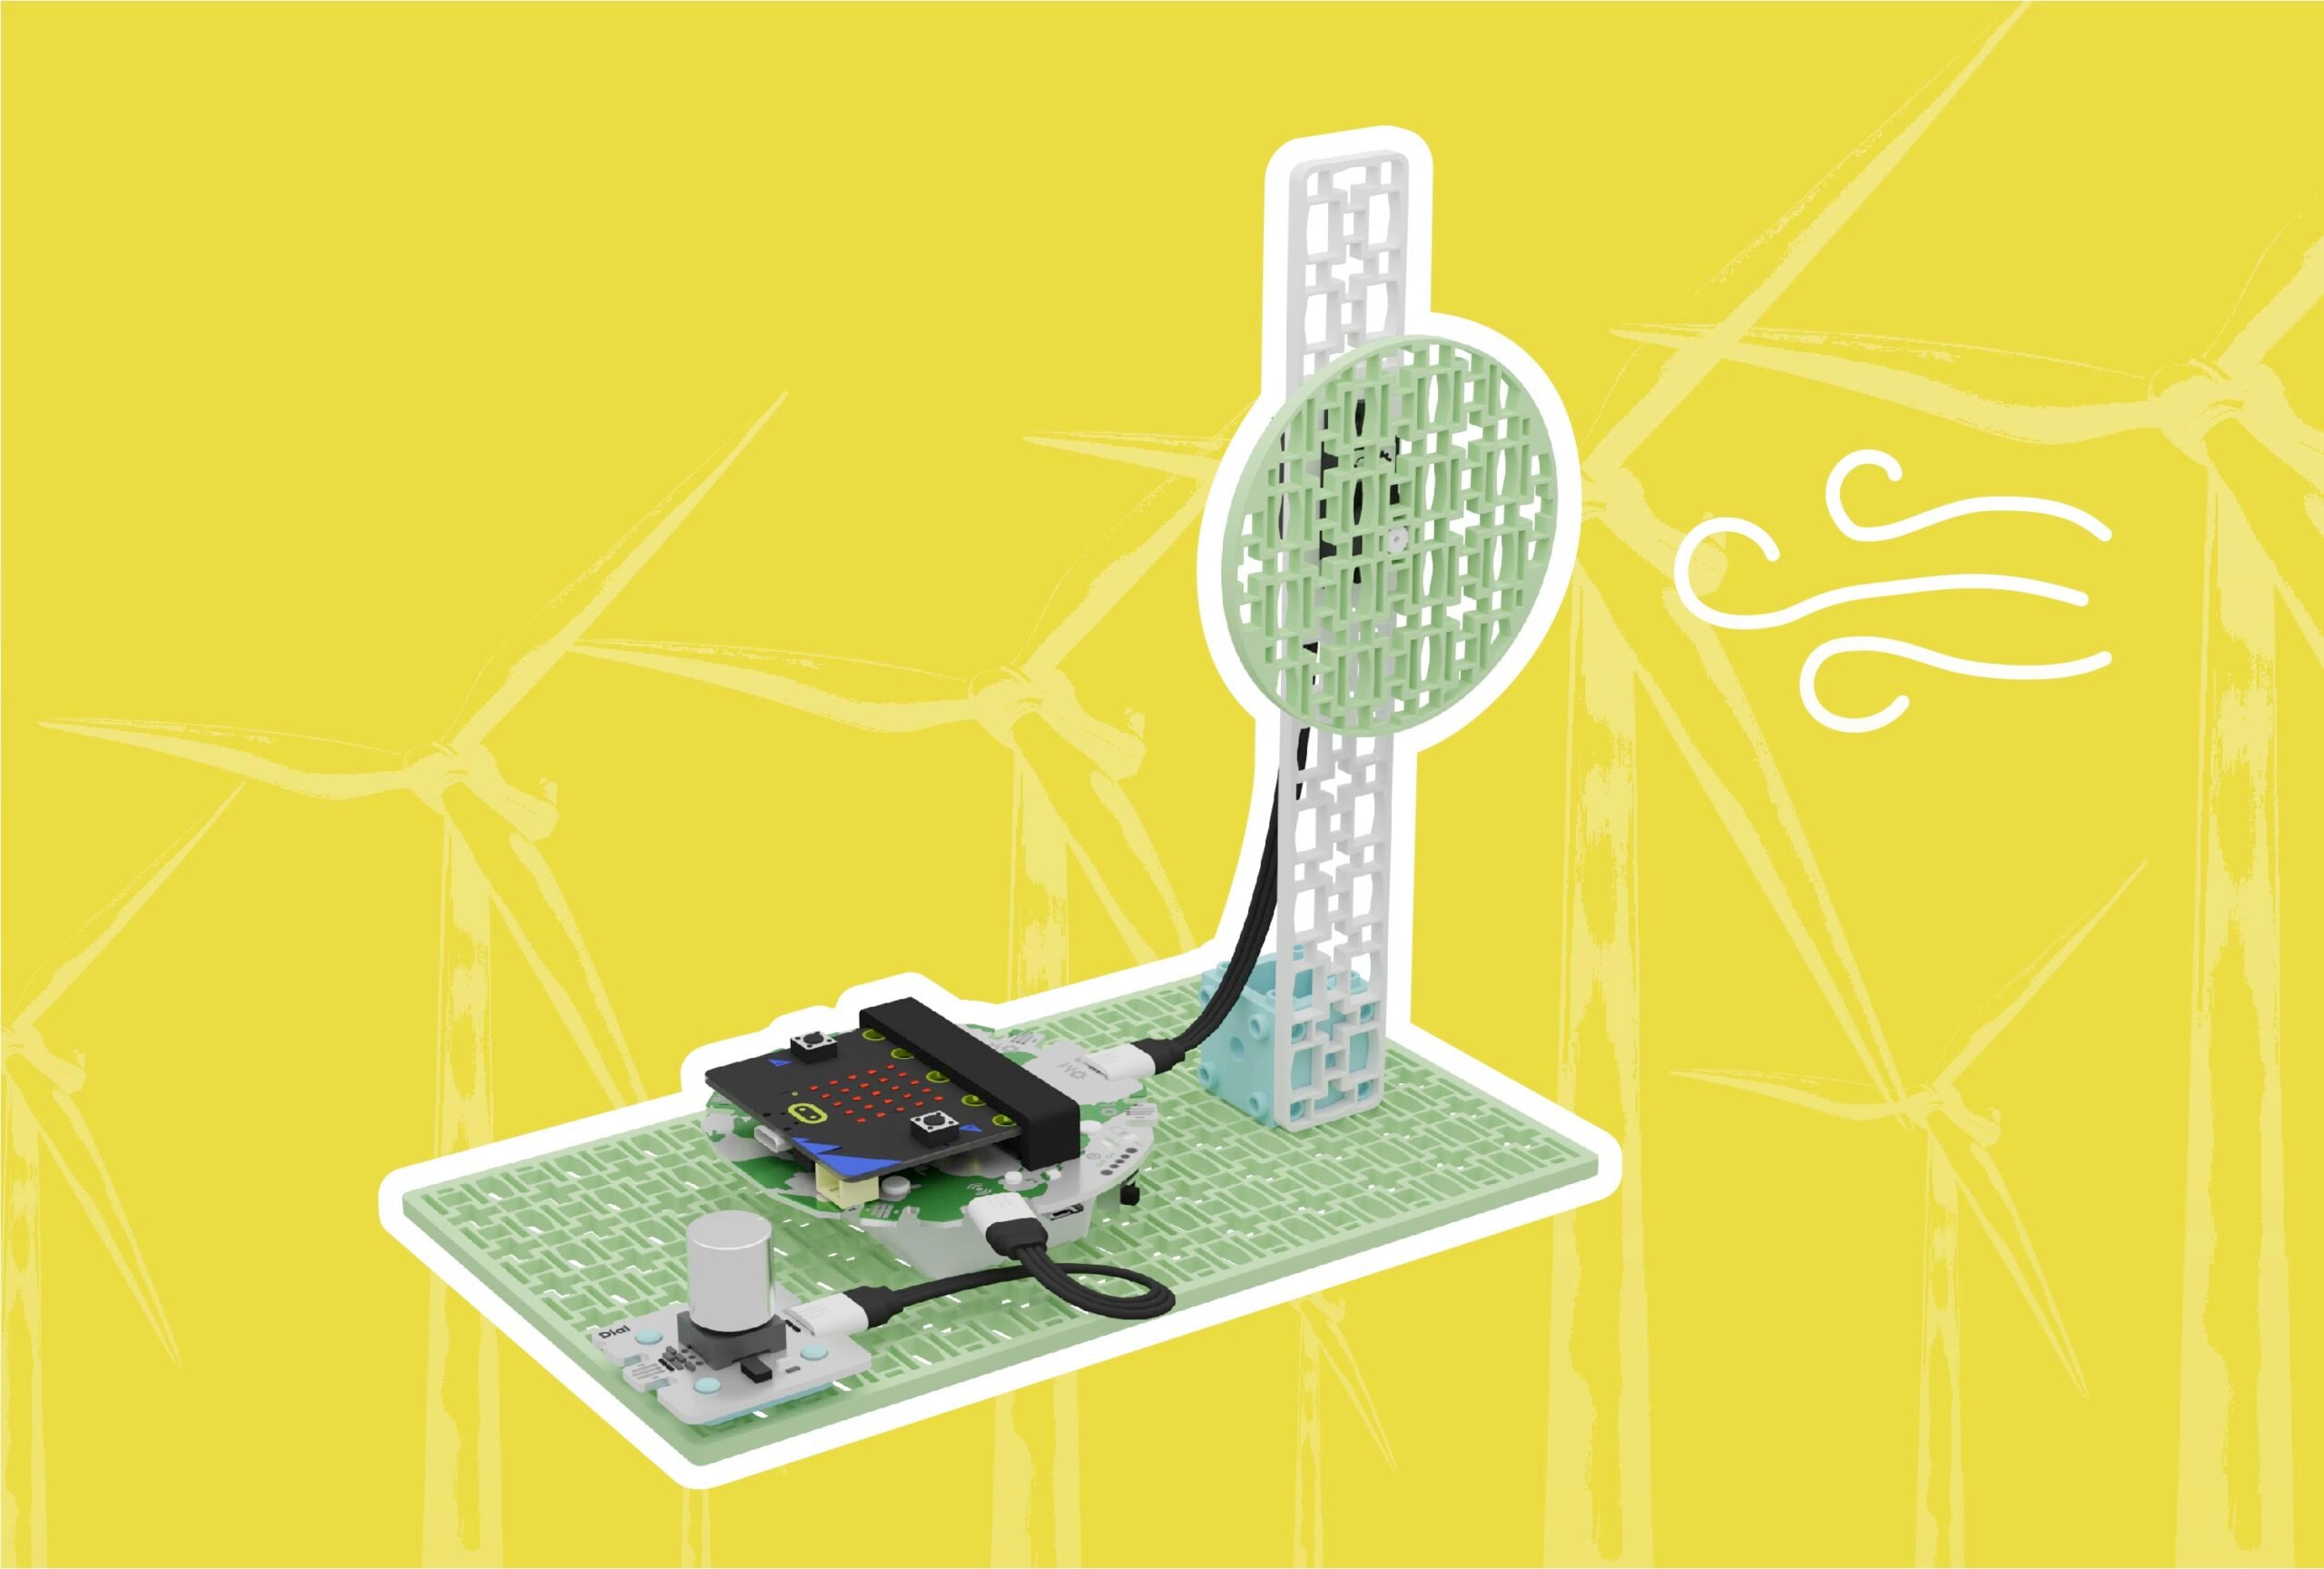
Turbine Speed Indicator With Smart Soldering Kit
Let’s think about Affordable and Clean Energy by modifying our Wind Turbine to include a speed status light!
The wind turbine in this project will:
- change the speed of a motor when turning a dial
- use status lights to indicate the speed of the motor
This project expands on the build and code featured in the lesson “The Powerful Force of the Wind”. We recommend you review the lesson before starting this project.
Prepare
You’ll need the following items to complete this project:
- Climate Action Kit
- micro:bit V2
- Previous soldered Smart Solder module
- Computer with access to Microsoft MakeCode
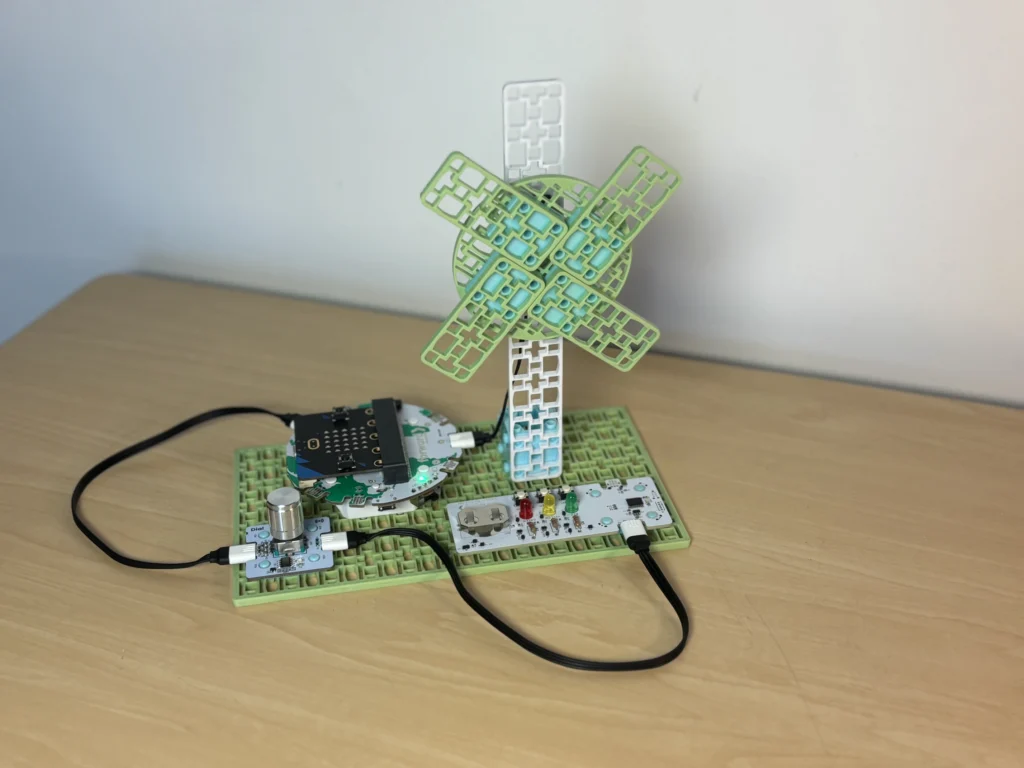
Build
First, let’s upgrade our original build to create our turbine speed indicator using the building blocks and robotic components from the Climate Action Kit and the Smart Solder component:
As you build this project, think about the placement of your status light so it is visible to users.
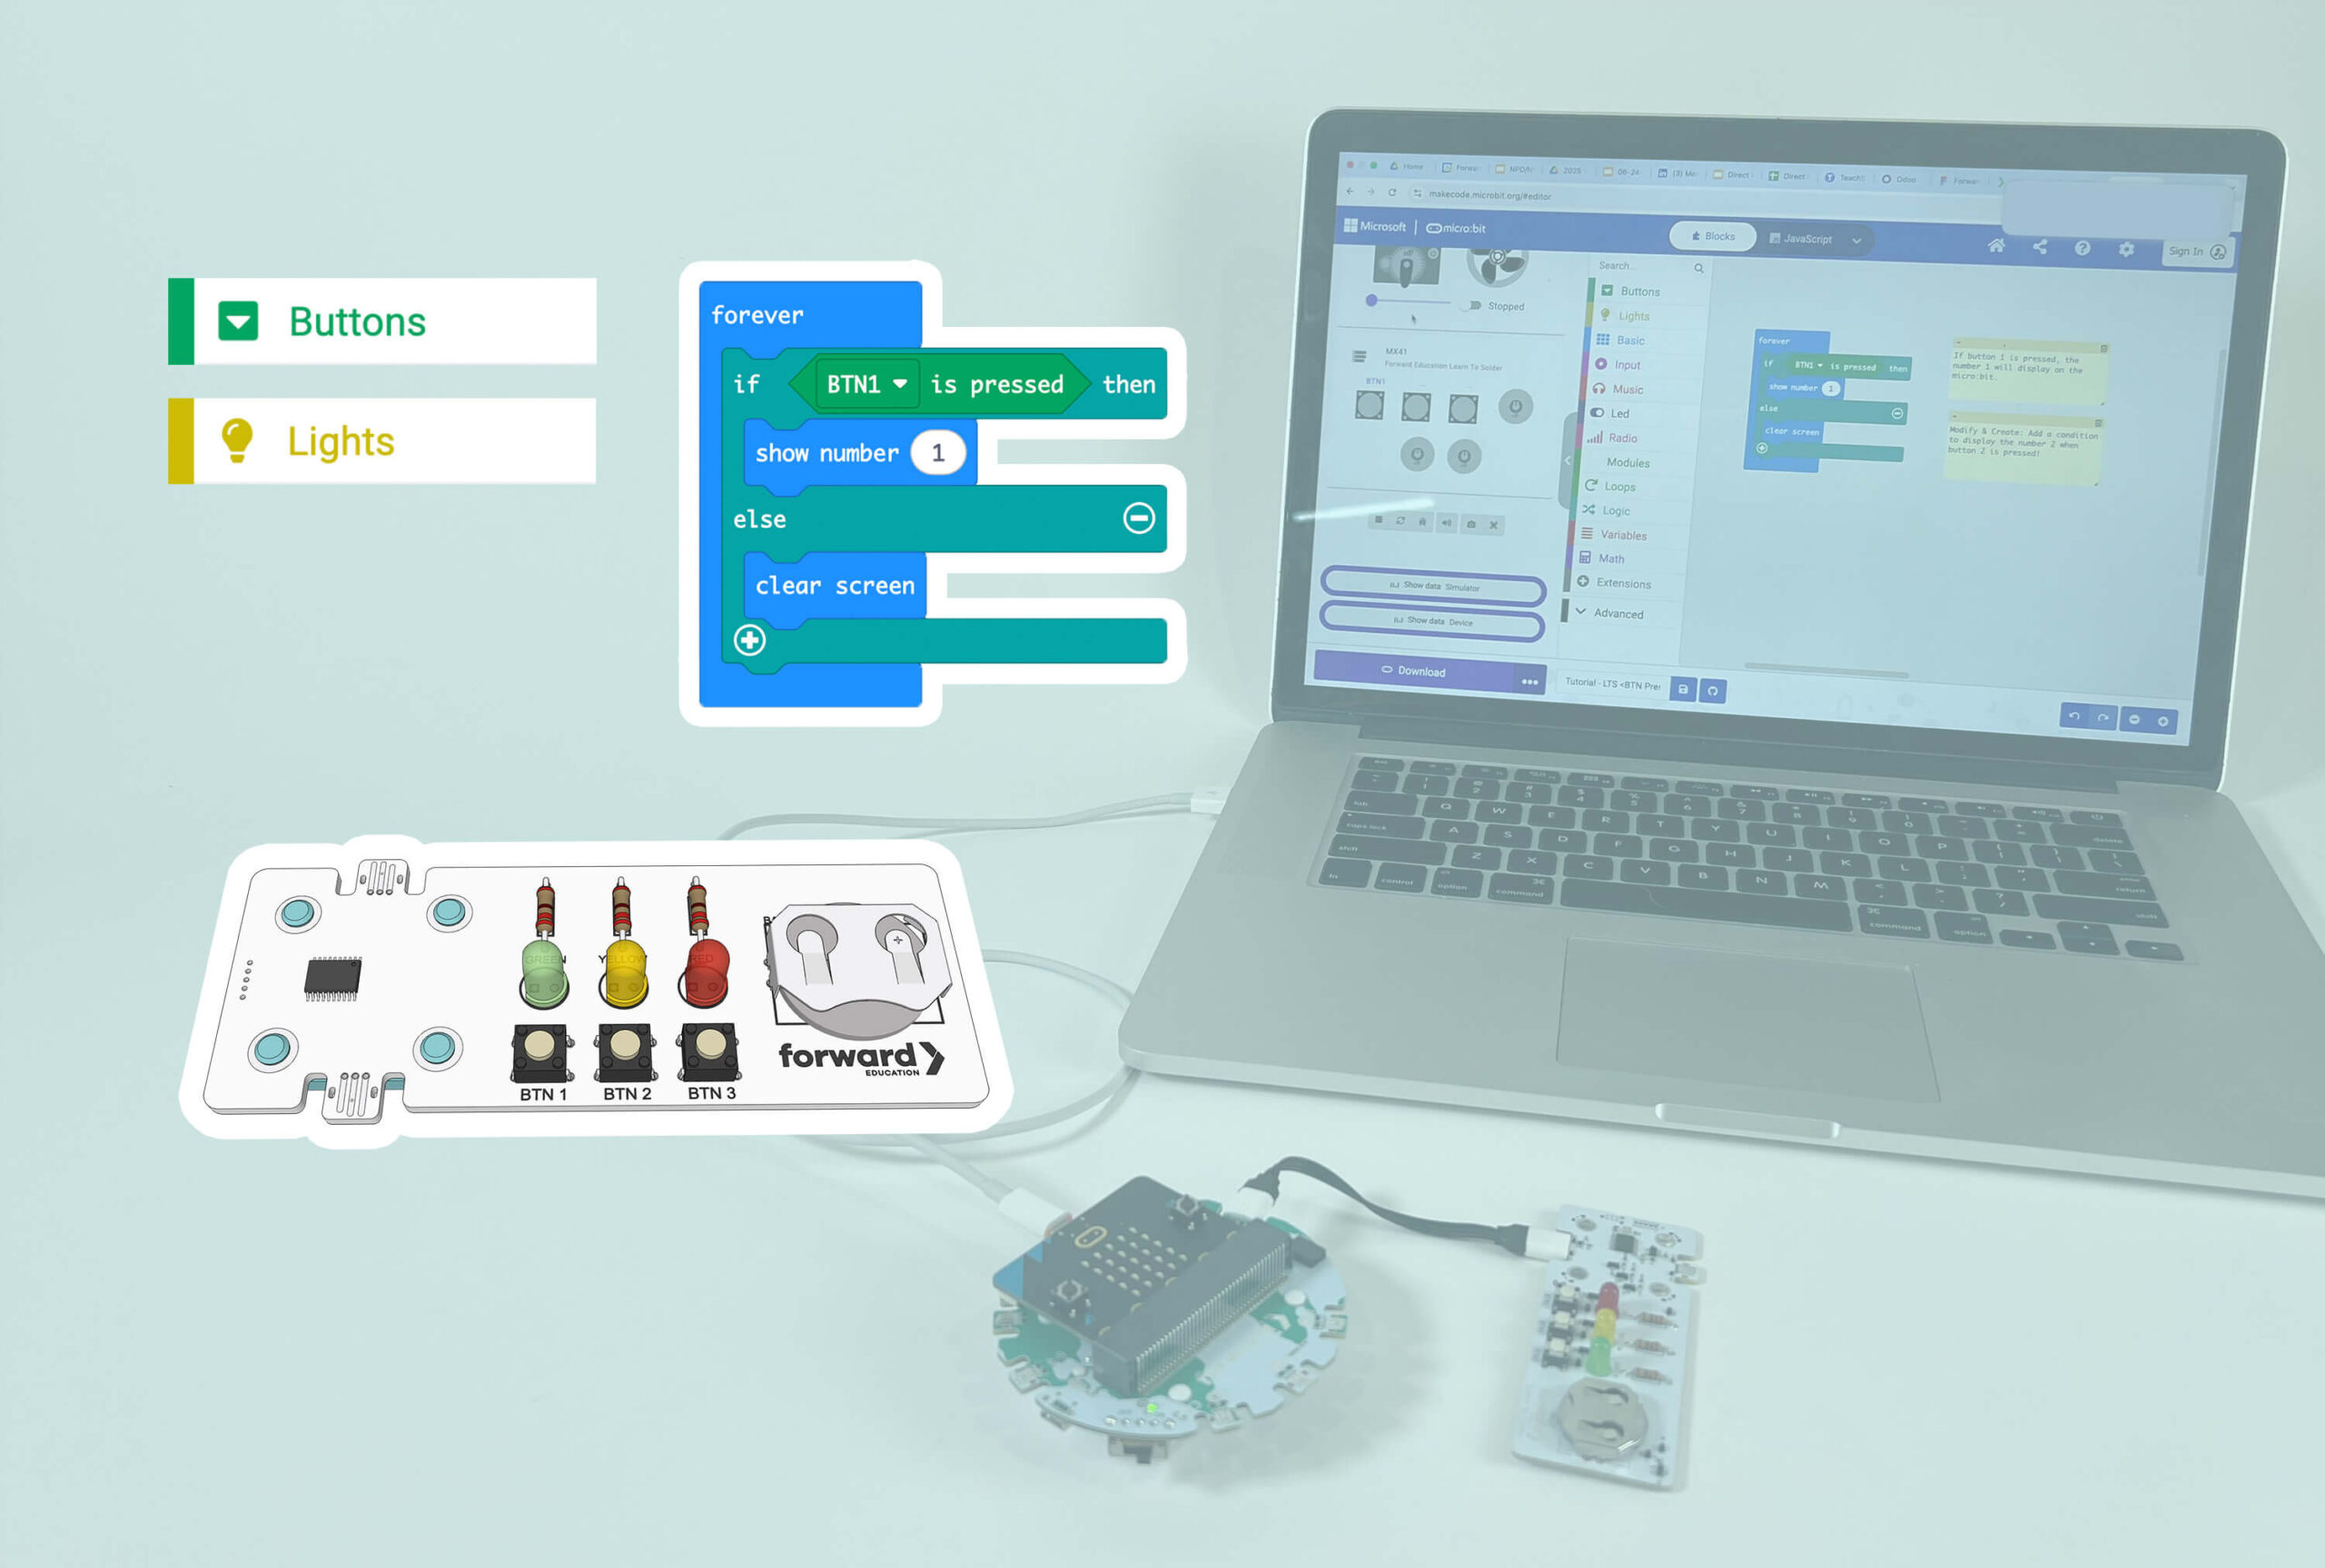
Code
Explore the code below to get started using your turbine speed indicator.
- Connect your project to the computer and download the starter code to make it work!
- Review the code comments on each block to learn about how your project works, then try testing it in real life.
Improve
Think about accessible features to add to your turbine speed indicator! How would you modify the sample code provided, or create your own code that includes the following features?
- A blinking pattern to indicate more specific turbine speeds
- Spin the wind turbine in 2 directions
No Smart Solder Kit? No Problem!
You can modify this project by replacing the Smart Solder component with the LED Ring from the Climate Action Kit, and test your turbine speed indicator using the code provided.
Related Content
-
Coding the Smart Solder Component
Learn about how to program the smart solder component from the Smart Soldering Kit. -
The Powerful Force of Wind
Explore how wind acts as a force that helps create renewable energy by building a simulated wind turbine. -

Wind Energy in Action: Generating and Storing Power
Build a wind turbine model to explore how we harness and store renewable energy!
Feeling Stuck? Explore the Knowledge Base for common questions and troubleshooting tips.