Writing When-Do Rules in MicroCode
In this tutorial, we’ll take the first step in making your micro:bit do amazing things by learning how to write your very own “When-Do” rule in MicroCode. As you learned in the previous tutorial, these rules are the fundamental building blocks of all MicroCode programs – they tell your micro:bit what to and and when to do it.
Materials
Instructions
Step 1: Start a New Project
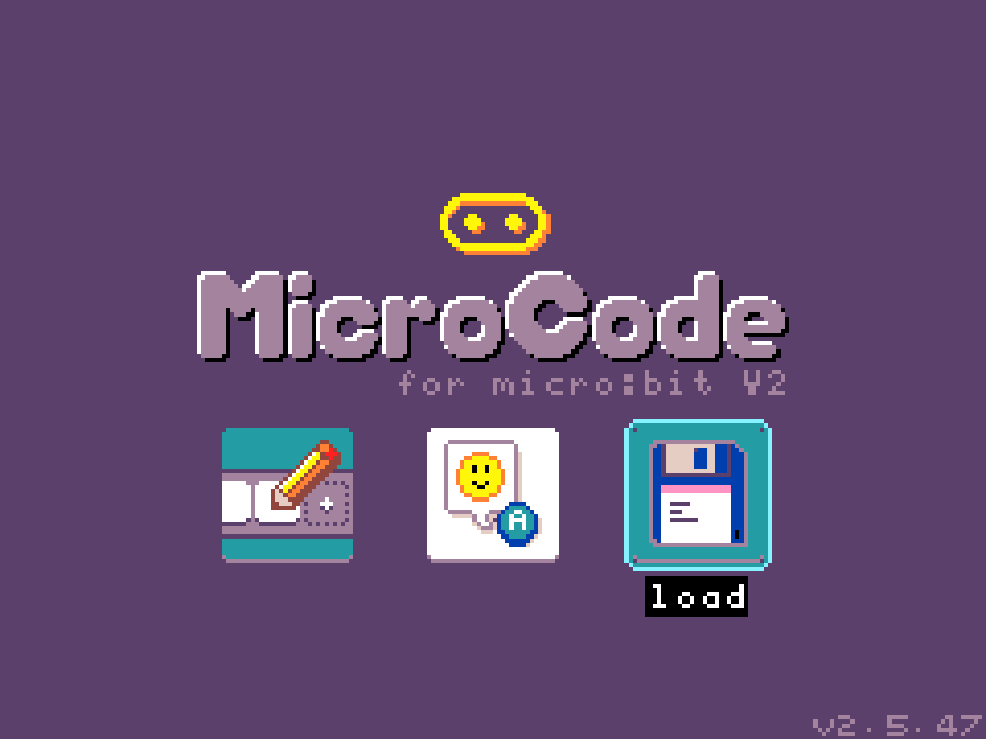
Power on CodeCTRL to load MicroCode.
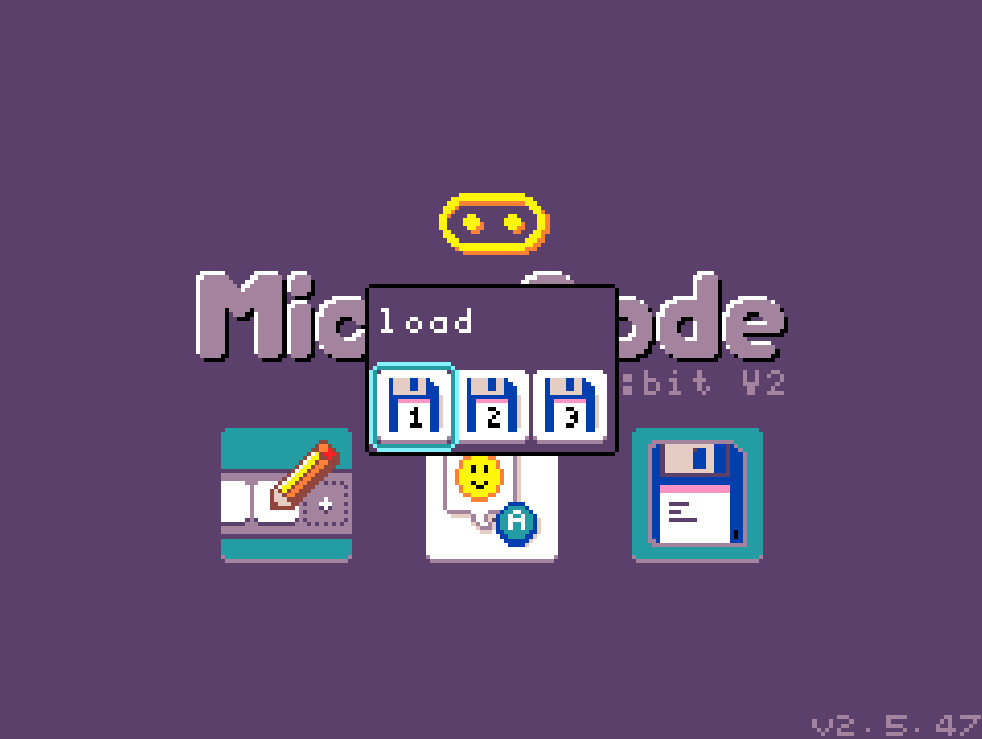
Then, use the joystick to select ‘Load’ to open a blank save file. Think of this as opening a new document to start your coding project.
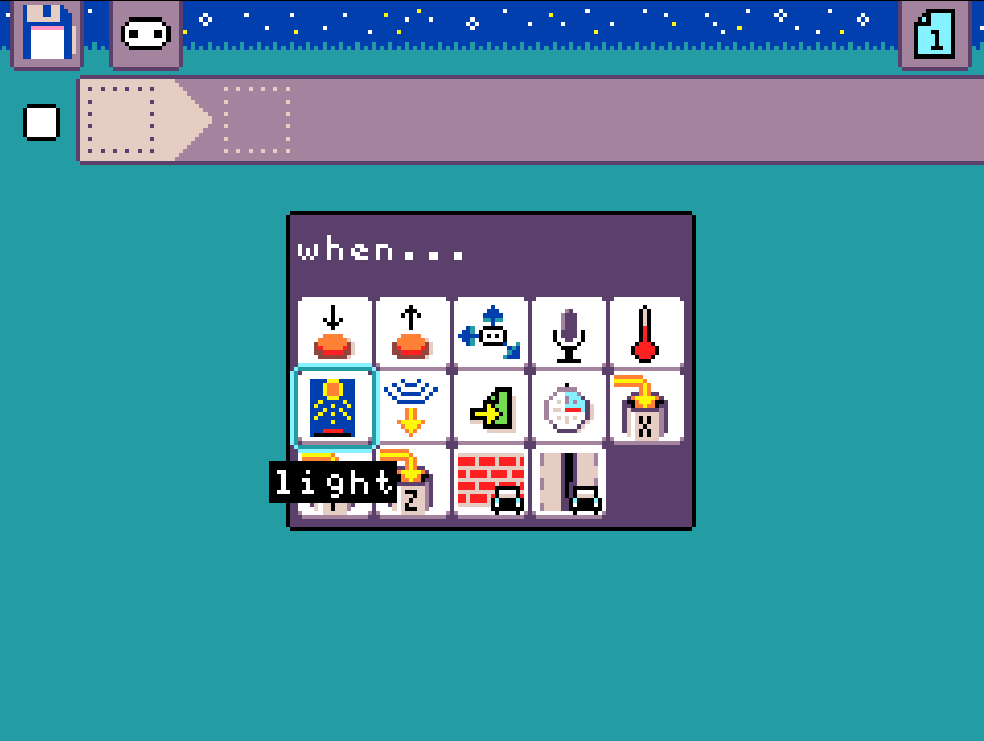
Step 2: Choose the “When” event
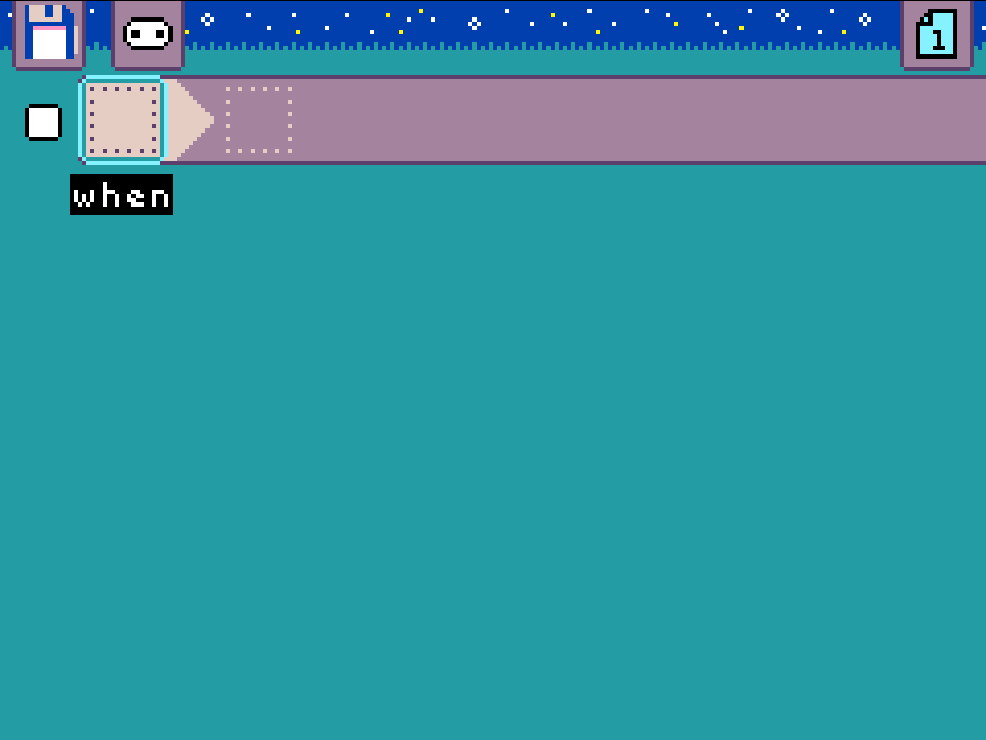
Hover over the leftmost empty tile and press ‘X’ to open a menu of all the cool things that can trigger an action – these are called events.
Select the event of your choice. In this tutorial, we’ll start with the ‘light’ event, which lets your micro:bit respond to changes in light levels.
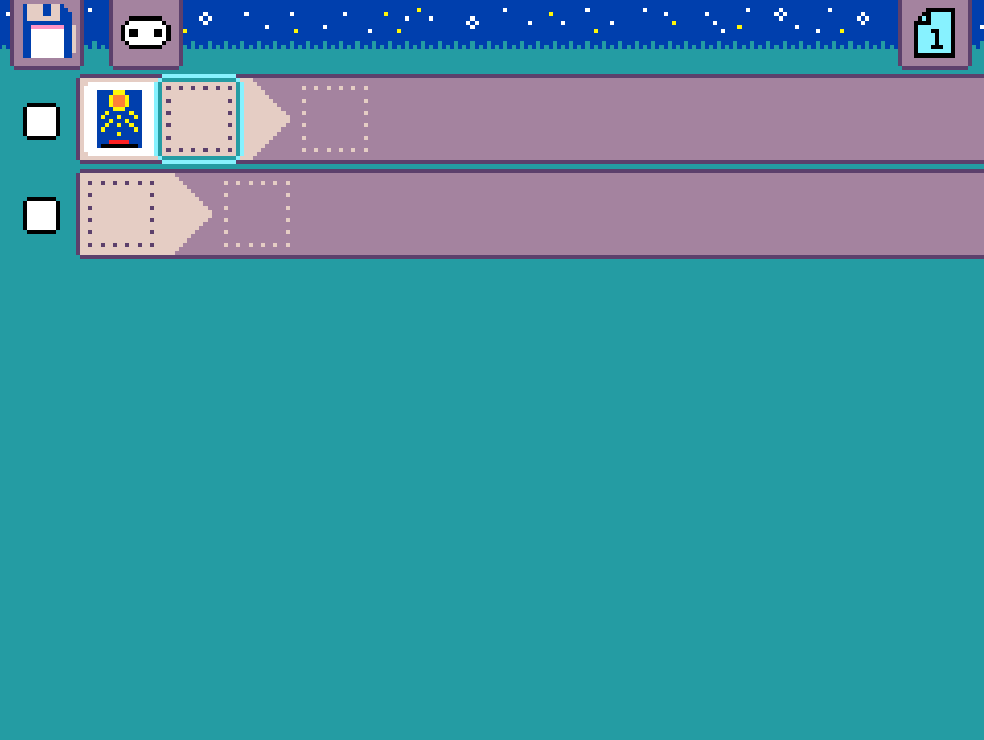
Step 3: Set the “When” parameters
Select the blank tile next to your chosen event. This will open a menu where you can fine-tune how the event works. These are called parameters.
Select from the list of parameters relevant to your chosen event.
- 1 dot: low light
- 3 dots: medium light
- 5 dots: bright light
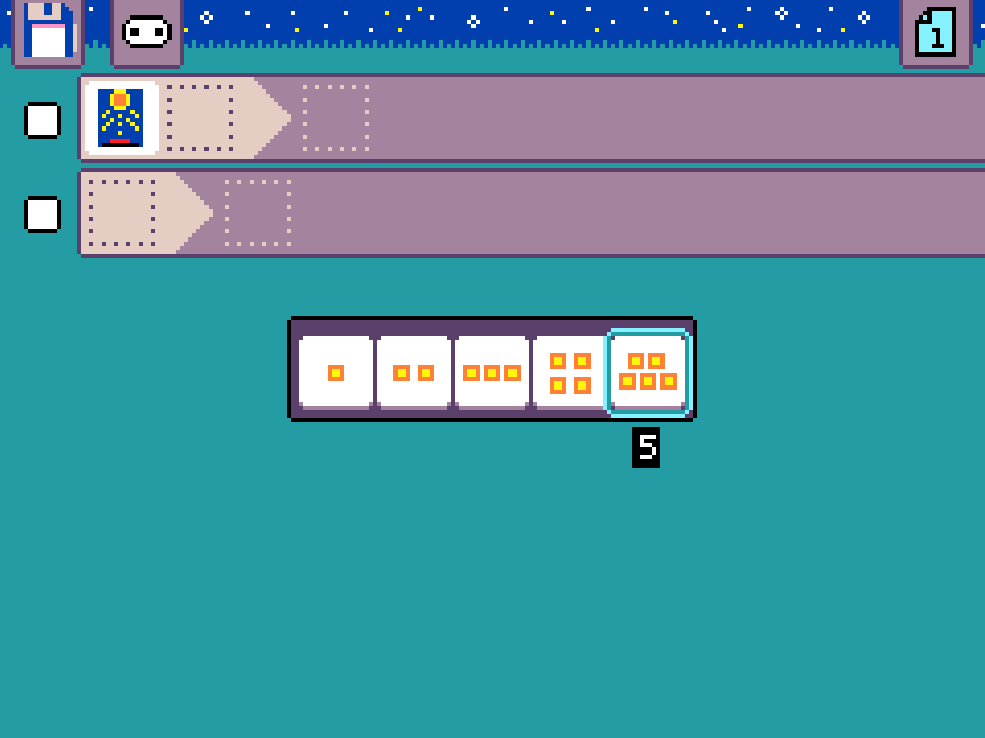
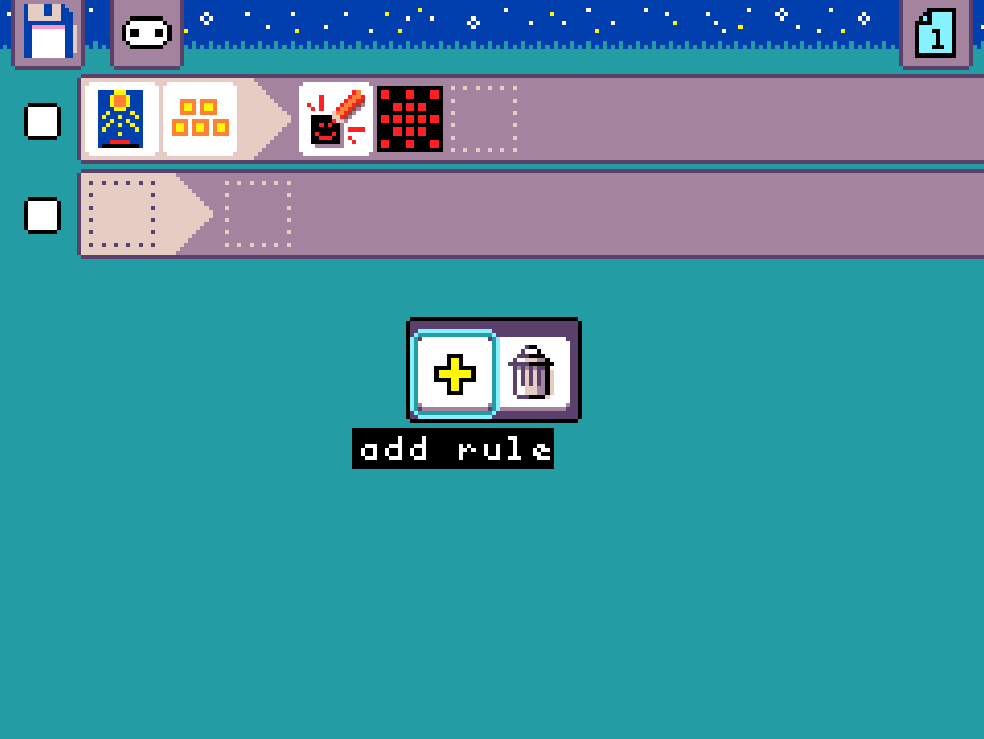
We’ve now programmed the first half of our rule to say: “When the light level is bright”.
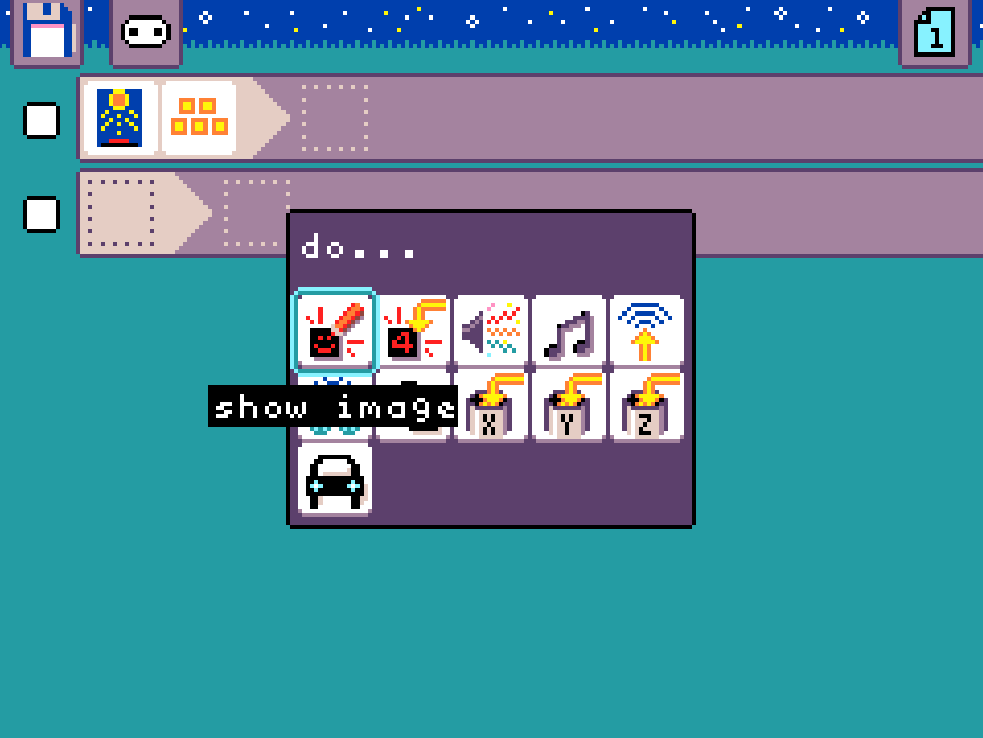
Step 4: Add the “Do” command(s)
Move to the “Do” section of the rule. This is where we’ll tell the micro:bit what to do after the event is triggered.
Select the first empty tile to open a menu of all the actions your micro:bit can perform – these are called commands.
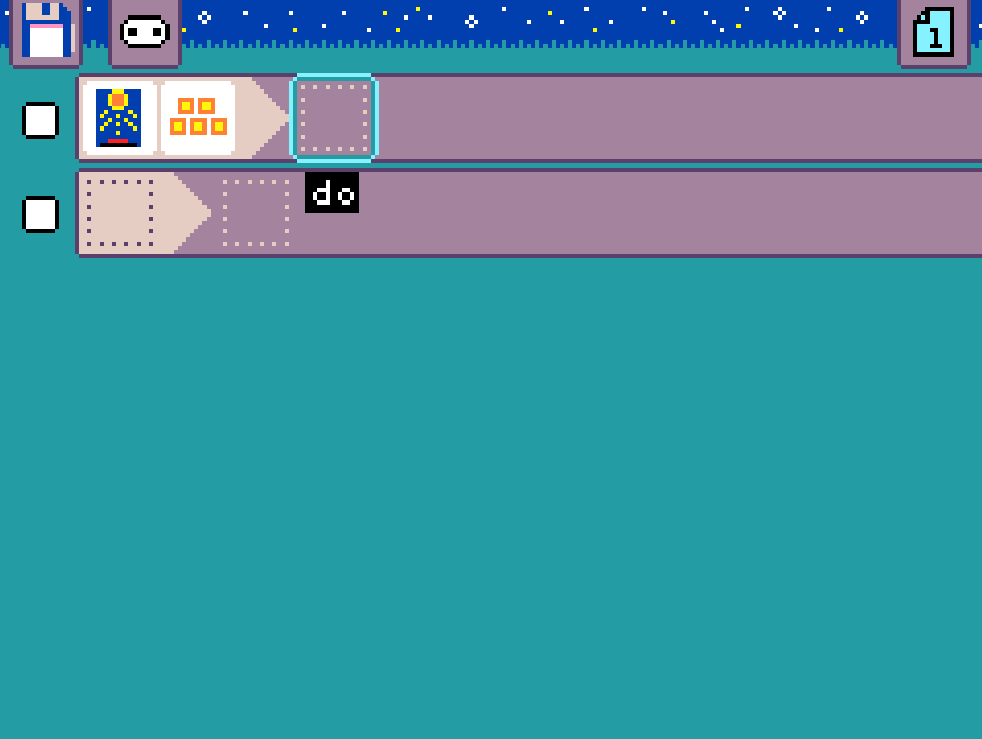
Select the command of your choice. In this tutorial, we’ll use the “show image” command to display something on the micro:bit’s LED screen.
Step 5: Select the “Do” parameters
Just like events, commands can also have parameters to control exactly how they work. Select the blank tile next to your new command.
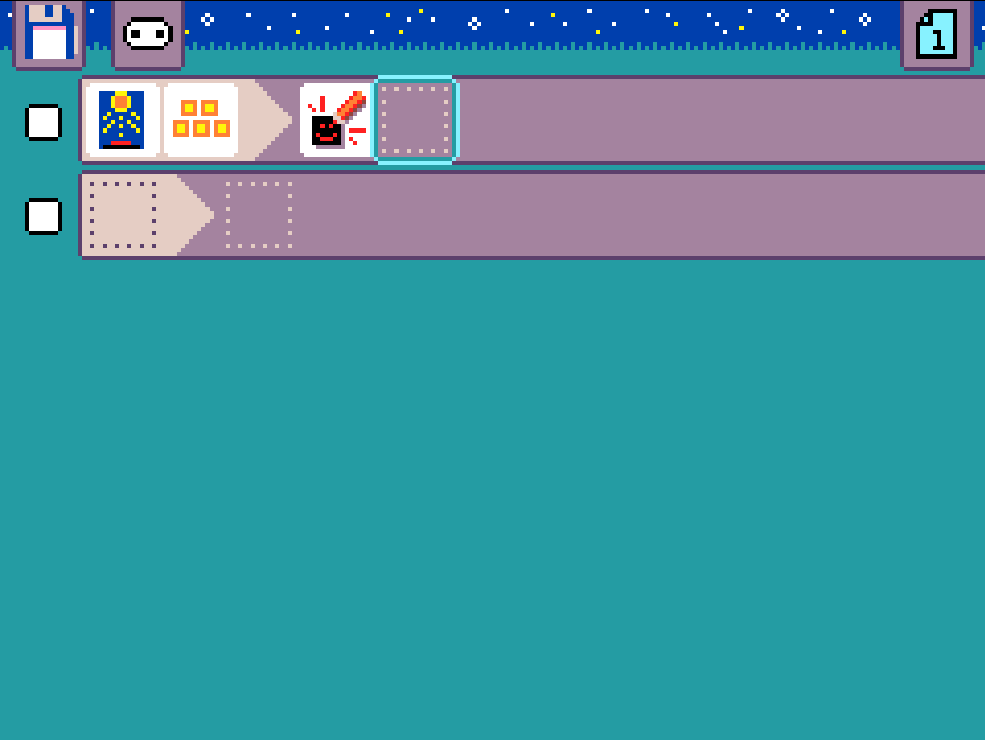
Then, select from the list of parameters relevant to your chosen command.
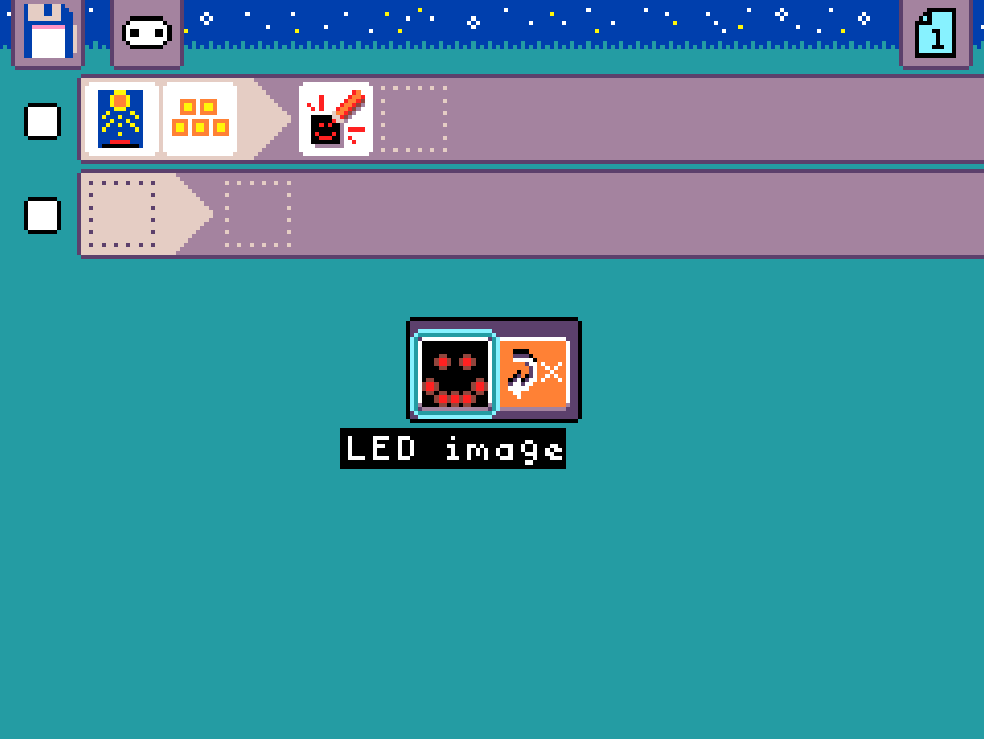
Since we chose “show image,” you’ll now see the LED image editor. This is where you get to draw! Click on the LEDs to turn them on or off and create your own icon or picture. Have fun with it!

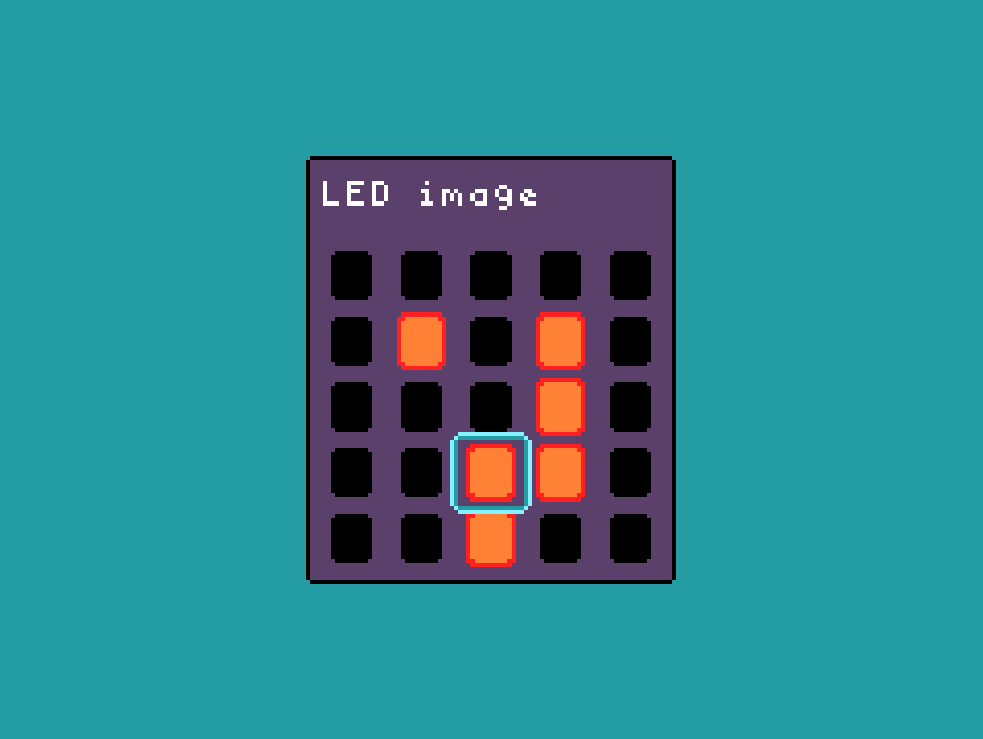
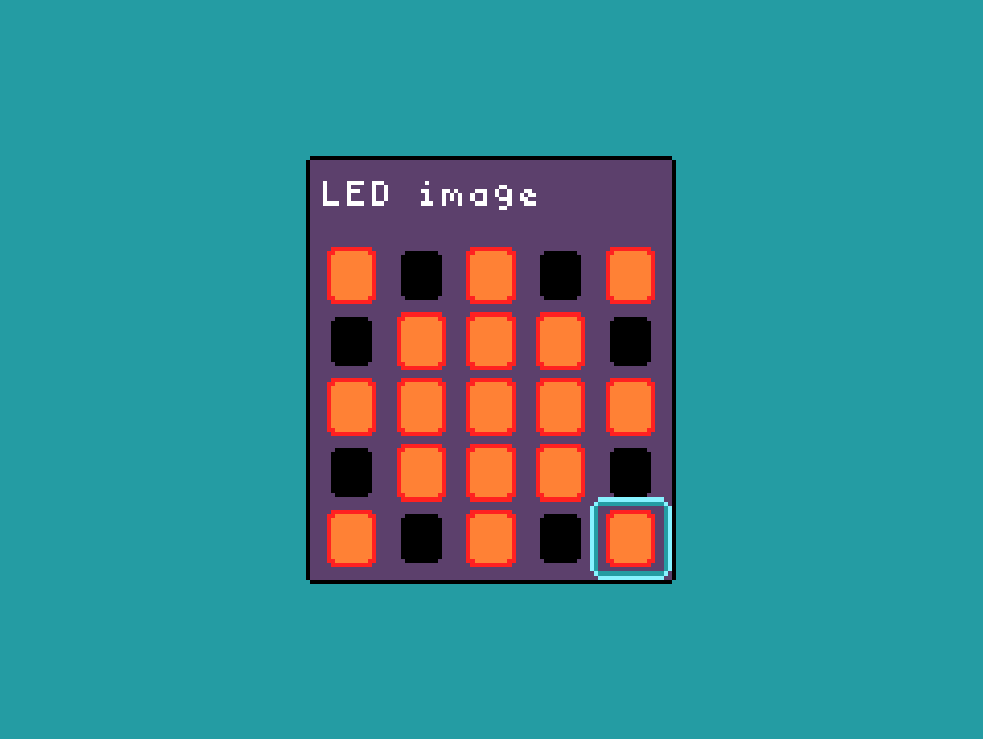
We’ve now completed a rule that says: “When the light level is bright, show a sun on the LEDs!”
Step 6: Go back to the main editor
Press ‘O’ to return to the main editor. You’re almost ready to see your code in action!
Step 7: Test your new rule
Shine a bright light on your micro:bit to trigger your rule and see what happens! The best part of programming the micro:bit with MicroCode is that you’ll see your new rules take effect immediately. This instant feedback makes learning and experimenting super easy and fun.
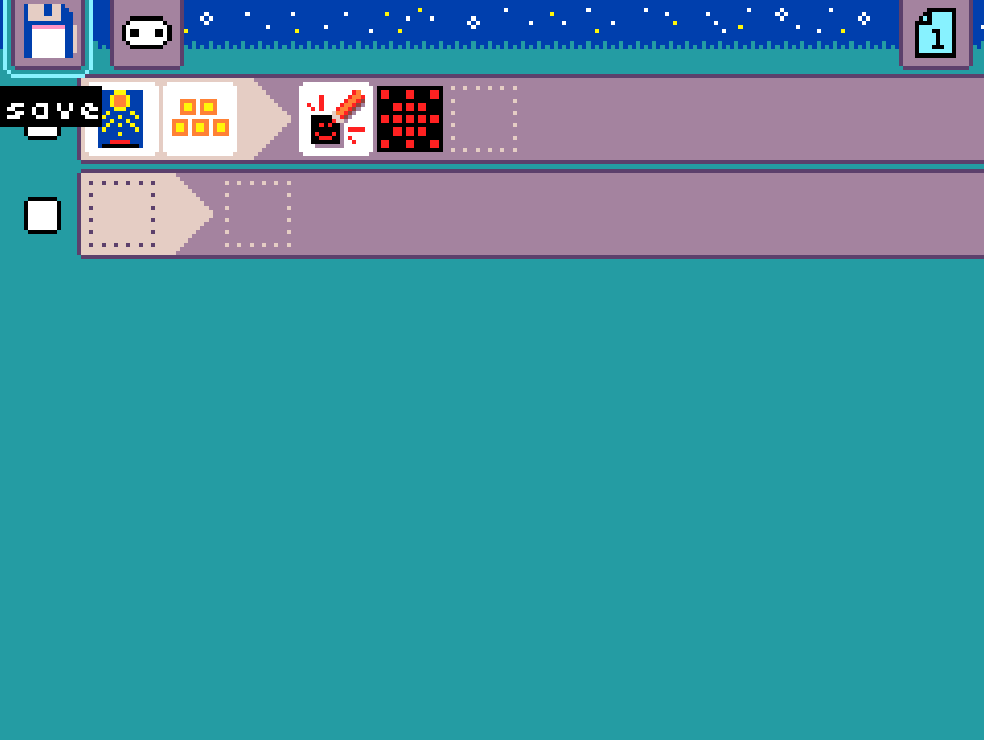
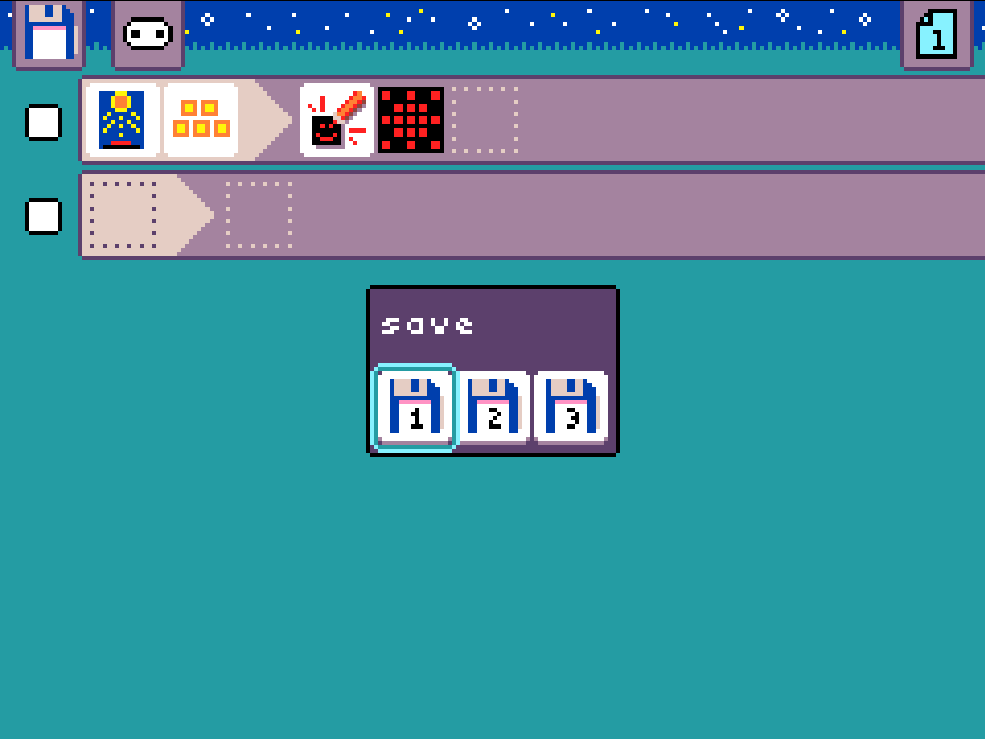
Step 8: Save your program
To keep your awesome creation, save your program by clicking on the Drive icon, located in the top left of the editor.
Then, choose which of the three save files you want to use.
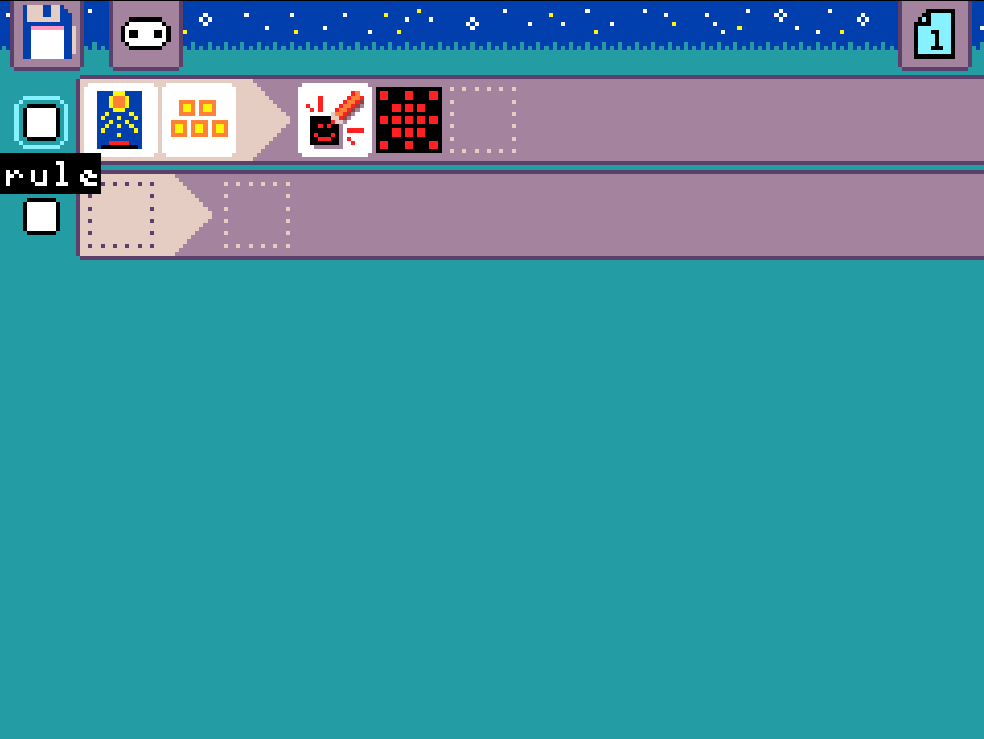
Step 9: Add or delete rules
You can add more rules to make your micro:bit do even more complex things, or delete rules you don’t need. Just select the box next to a rule to add a new one or delete it!
Challenge: Try adding a new rule to change the display when there is low light!
Related Content
-
Introduction to MicroCode
Learn about the MicroCode programming language and its editor! -
MicroCode Bee Tracker
Use MicroCode and CodeCTRL to write a program for your bee counter! -
Step Counter with CHARGE Power Pack
Code your own step counter with MakeCode or MicroCode!
Feeling Stuck? Explore the Knowledge Base for common questions and troubleshooting tips.